My twelve-year-old daughter is an incurable science nerd who is way beyond her years and thoroughly bored with the junior-high-school experiments and basic concepts she has long since mastered. I’ve had to discover new ways to cultivate that excitement at home, even though my own interests lie more in right-brained endeavors which are more in tune with my own collegiate background in literature at Cal Berkeley. I’m quite sure my daughter on the other hand, will be destined for some more distinctly left-brained college like MIT or Stanford.
So how can a non-sciencey mom cultivate those interests at home? First of all, the key is to not be intimidated. Science does not have to be intimidating or frustrating – and more to the point of my newly-redecorated den, it doesn’t have to be messy or smelly. Home science for kids is all about exploration, discovery, and fun.
I could have put together some basic science experiments from scratch, and I remembered my own grade school experiments of putting a celery stalk or a flower in a glass of colored water, and watching the coloring gradually climb up the stem. Simple but effective! But those sorts of basic experiments are unfortunately, far too basic for my twelve-year-old, and with my own limited scientific knowledge, I wasn’t up to the task of putting together much more than that.
The solution of course, was a do-it-yourself science kit. Available at some craft stores, home school stores, and online, a kit gives a parent the ability to seem smarter than they really are, and they usually come with everything you need all in one box.
You can even get dissection kits, complete with frogs, cow eyeballs, fetal pigs or sheep’s brains. Ewww! Not ready for that yet. I did however, buy the Make Your Own Chocolate Kit, which I admit was more for me than for the kids.
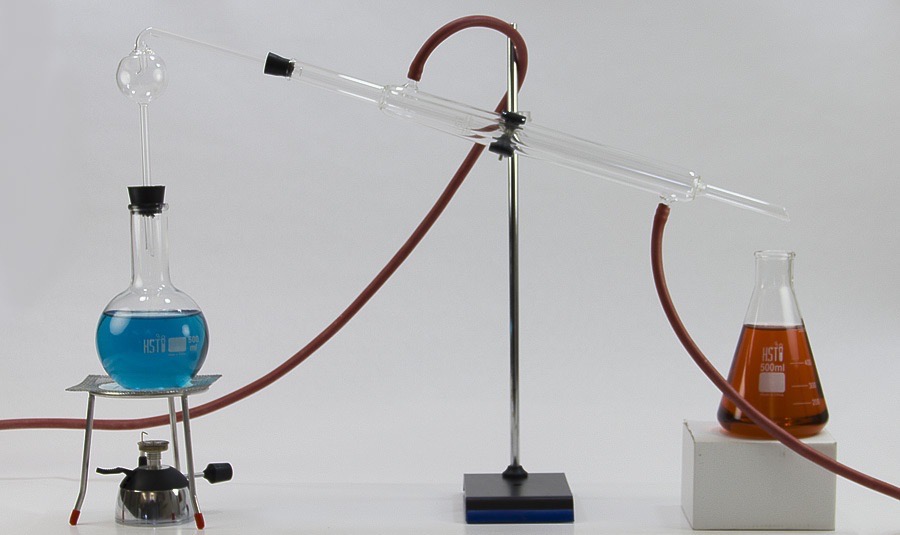
I found a distillation kit at HomeScienceTools.com. No, we didn’t make margaritas with it, but we had great fun together with some very educational experiments!
Before opening the box and setting up the experiment though, together we put together a “lab” area. A small, unused room which served as an overflow for storage, boxes, and things that probably should have been thrown out years ago was quickly transformed – and with the promise of her very own lab, this was a great way to enlist my fledging scientist’s help in cleaning out the room.
Our lab quickly came into shape, lining one wall with multiple containers, which were mostly old and unused plastic boxes; an old particle-board bookshelf, and some cleaning supplies. We replaced our kitchen table last year, and the old one sat in the corner in pieces – we quickly reassembled it and it became our workspace. You may be surprised at how many lab items you can find in your kitchen and basement!
Here’s a tip: Start saving used coffee cans. I’ve found that these have become enormously useful for storing almost everything imaginable. A few other items you’ll need include a small fire extinguisher – not that you’ll need it, but it’s always a good idea to be safe. These can be found in most home stores and are fairly inexpensive. Pick up some rubber gloves and two pairs of plastic goggles. I also found that white lab coats were invaluable – not only do they protect your clothing from any spills and splashes, the “lab coat effect” helps you and your child really feel the part. Old rags for cleaning, a handful of clamps, some plastic and glass containers and two or three sponges, and we had a suitable beginning. I also bought a portable labeler, to help keep track of everything.
Another important tip to remember: Make sure you have a window that can open for ventilation. Put a screen in the window to keep out the bugs! You don’t want anything from the outside contaminating your experiments.
Finally, as any good scientist understands, make time for fieldwork – all day in the lab is a good start, but make time for outdoor observations. Go bird-watching and catalog the birds in your town. Embark on a study of archaeology and see if you can find some little bits of history. You’ll be surprised at what you might find – we’ve found everything from arrowheads, to 19th century bottles, all of which were great conversation starters and triggered further study on ancient cultures, to noticing the wavy lines and bubbles in the glass and using that in a discussion of how glass is made.
Your home science lab will be constantly changing and growing. Don’t be surprised if you’re constantly adding to it!
Victoria Twyckenham is a contributing editor at Mommybrain.net. You can contact her at victoria@uglydogmedia.com.


